ATT.Net Email Configuration
If you’re seeking for ATT.Net Email Settings, you’ve come to the correct spot. This guide will help you through the whole process of setting an ATT net email account on your device. Many of you may not be aware of the proper AT&T email settings, and there is nothing wrong with it; we all have to learn the procedure for the first time. The procedures described below will definitely help determine the correct AT&T email settings and successfully setting up your account on various devices and email clients. The processes are really simple; no technical knowledge is required to follow and execute them. Simply continue to follow the instructions below based on your email client and device type, and your account will be successfully set up within a few minutes.
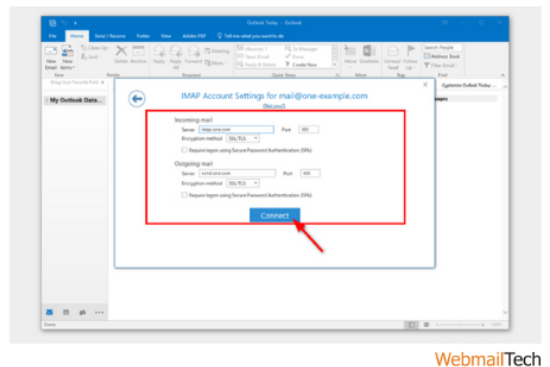
ATT.NET Email IMAP Server Configuration
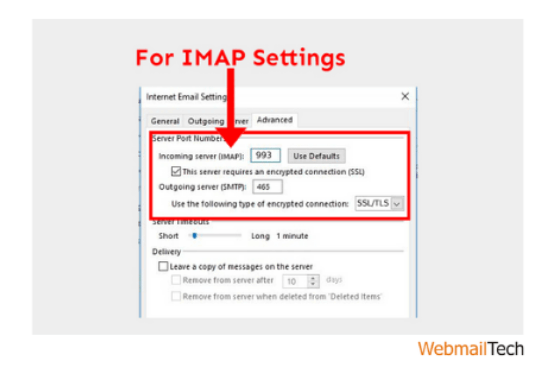
The ATT email settings for IMAP are shown below; you must use these settings in order to use the incoming email services without issue: –
- IMAP should be the account type.
- Enter your ATT email address as the username.
- Enter the username’s password.
The incoming server’s hostname should be imap.mail.att.
- The server port should be set to 993.
- Enter your username and password for verification.
- For SSL/TLS, enter yes.
After setting your att.net email IMAP settings, you will be able to use the att incoming mail services.
ATT.NET Email SMTP Server Configuration
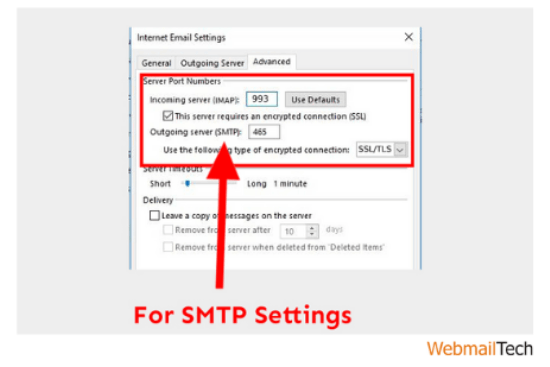
To apply the required Outgoing (SMTP) server setting for ATT, follow the procedures described below.
- The account should be set as ‘SMTP.’
- Use your email address as the username.
- Use your ATT password.
- Smtp.mail.att.net should be the server hostname.
- The server port number should be 465.
- For authentication, enter your email and password.
- When asked for SSL/TLS, select ‘yes.’
When you use the att.net email SMTP settings, you will be able to use the att outgoing email services without any issues.
ATT.NET Email POP3 Server Configuration
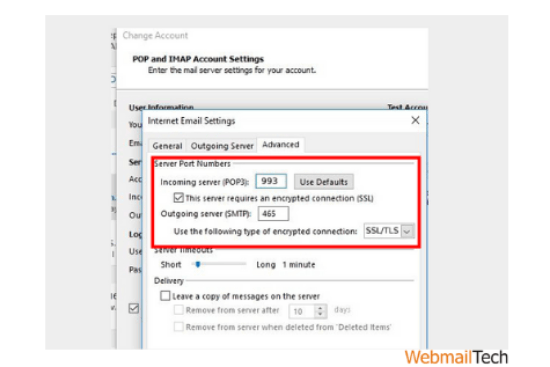
The following are the POP3 settings for ATT email that you must apply in order to access the att email services on your device or email client:
If you choose to use POP3, enter the following incoming server settings:-
- The ATT pop3 incoming mail server should be inbound.att.net.
- The value for the server should be 995.
Enter the following information for the POP3 SMTP outgoing mail server:
- The outgoing mail server should be ‘outbound.att.net’.
- 465 is the correct port value.
- Check the ‘requires authentication’ box.
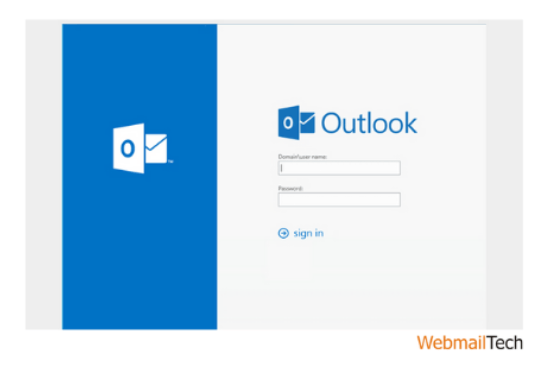
ATT Yahoo Email Configuration For Outlook
Find the ATT.Net Yahoo Email Account Settings For Outlook & iPhone below; the settings have been tried and tested, and you can just follow the basic steps to correctly configure your email account.
Yahoo and ATT
Net email account subscribers would surely like the ability to access and respond to important emails while on the go. ATT configuration Net Yahoo Email on Outlook gives you quick access to emails no of where you are.
Step-by-step instructions are provided here for syncing ATT.Net yahoo email accounts on Outlook.
ATT Email Configuration for Outlook 2010
The procedures below will help you with the automatic setup of your AT&T email account on Outlook 2010.
- Open the web page. Click on the outlook link.
- Click to the new option and pick file.
- Select on Account Settings and Information.
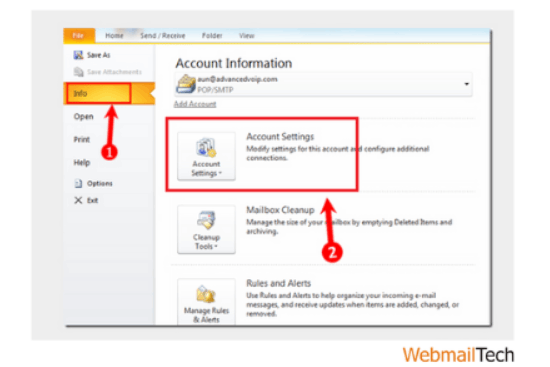
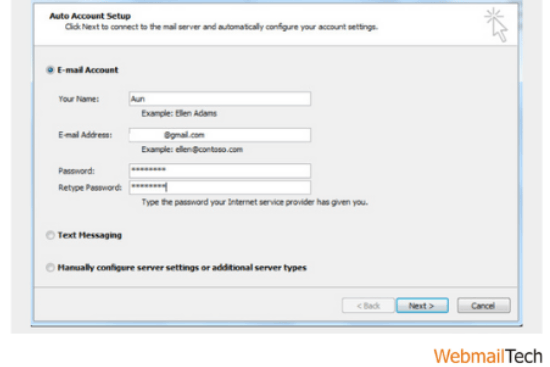
- You will later come across Auto Account Setup.
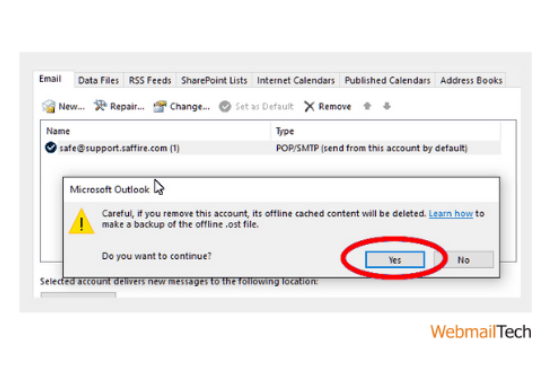
- During the account setup process, you will see many warning notifications.
- Continue and then selecting yes below.
- Microsoft Outlook 2010 configures your account as an IMAP account with all of the required settings.
- Move to the next step and press the yes button.
The setting for automatic update for Outlook 2010 has been made, and you may now use AT&T email services on Outlook 2010.
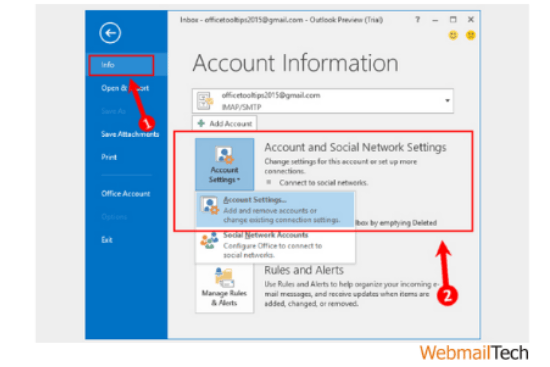
ATT.Net Email Configuration For Outlook 2013
The methods for automated settings are listed below, and they may be followed by anybody because the procedure is simple and quick.
- Open the Outlook webpage and choose Files.
- Click on Account Settings and then on Info.
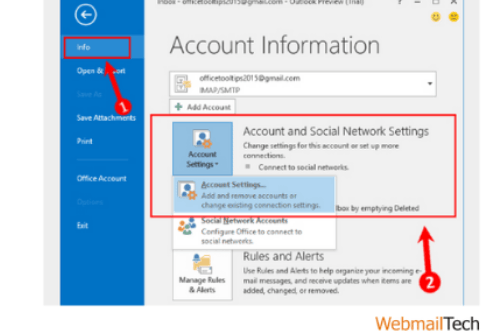
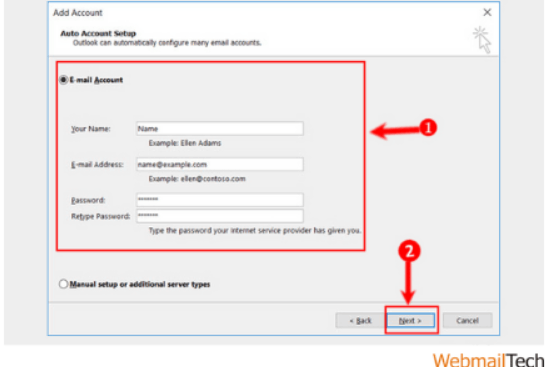
- A screen would appear, prompting you to enter details for the Auto setup. Click on “Next” to proceed.
- Click on Allow and select Yes.
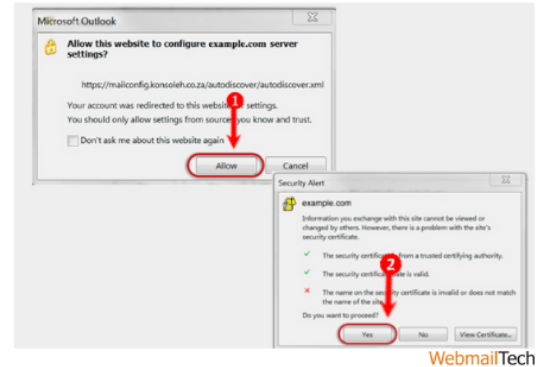
Your Outlook will connect directly to your IMAP account, keeping all connected settings.
- Click Finish and then OK.
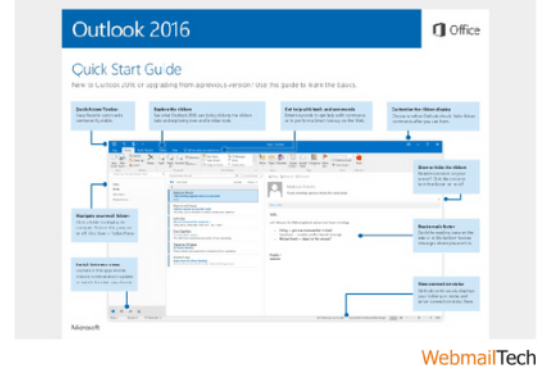
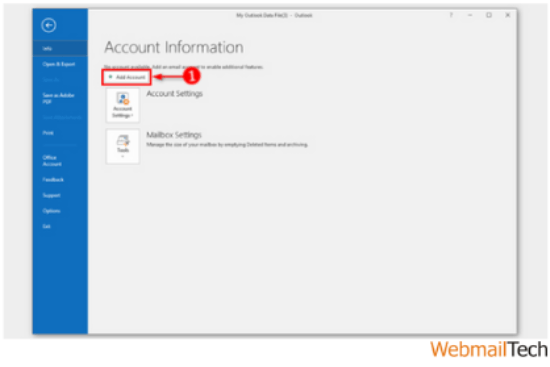
ATT Email Configuration For Outlook 2016
AT&T email settings for the current version of Microsoft Outlook 2016 include freshly updated options. The steps are easy to remember and are described in terms –
- Start the outlook webpage.
- Register for a new account.
- Go to the left side of the screen and press the tab key.
- Select the top of the web page’s left bar.
- You may now access the Info and Account Settings menus.
- Click the Add Account button.
- Then enter your email address.
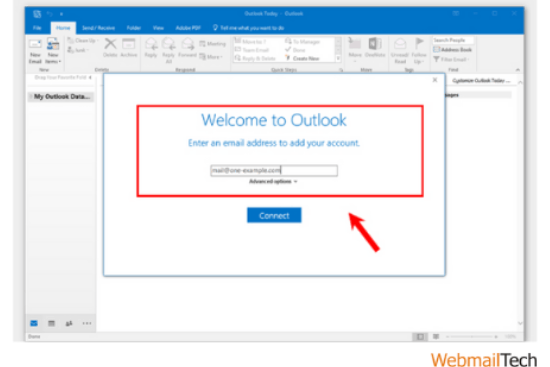
- It will automatically choose “IMAP” as your updated settings.
- Connect should be selected.
- After that, finish and close.
Your auto setup for MS Outlook 2016 is complete, and you can proceed to the step-by-step procedure for thorough setup update.
ATT.NET Email Configuration For Android Phone
- To start, select the Manual Setup option.

- Now, select IMAP Account.
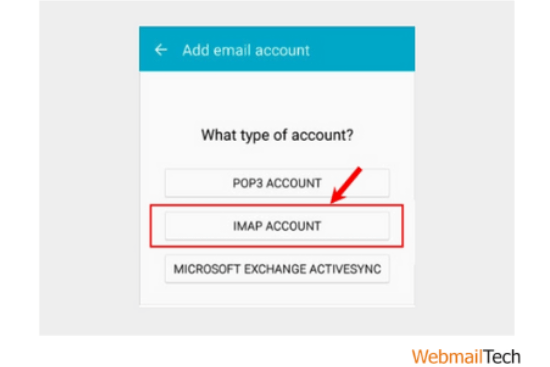
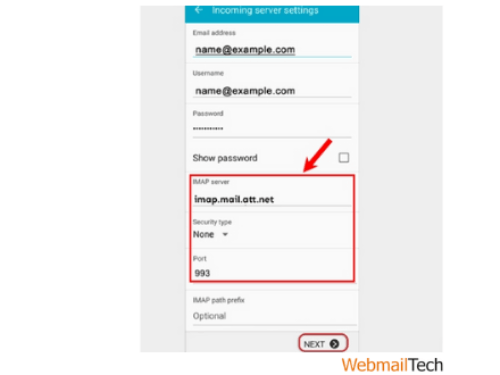
IMAP provides internet Message Access Protocol ( Be sure to enter the below necessary settings and then click ok)
| IMAP Server: | imap.mail.att.net |
|---|---|
| Security Type: | None |
| Port: | 993 for IMAP |
| Secure Port: | 993 |
| Security Type: | SSL/TLS ( Accepted all certificate) |
| Incoming Port: | 143 |
| Security Type: | None |
- Enter the ATT.NET outgoing SMTP settings shown below and click Next.
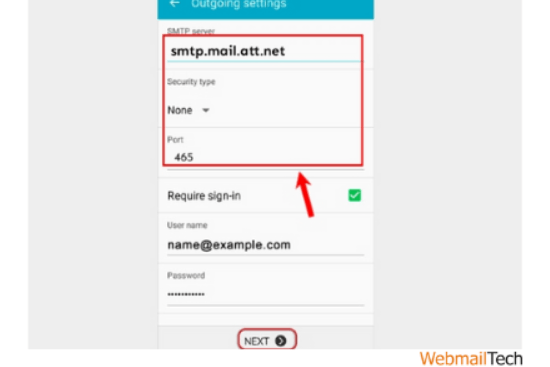
| Outgoing Server (SMTP) | |
|---|---|
| Secured Port: | 465 |
| secure type: | SSL/TLS |
| Outgoing Server (SMTP roaming server) | |
| Secured Port: | 587 |
| Security Type: | SSL/TLS |
| Incoming Port: | 587 |
| Security Type: | None ( Accepted all certificates) |
Once you’ve completed the instructions, your email setup will be updated for the Android version.
ATT.NET Email Configuration For iPhone
The following are the steps for setting ATT email on an iPhone:
- You must click on the settings button on your Home page.
- Then you must select Mail.
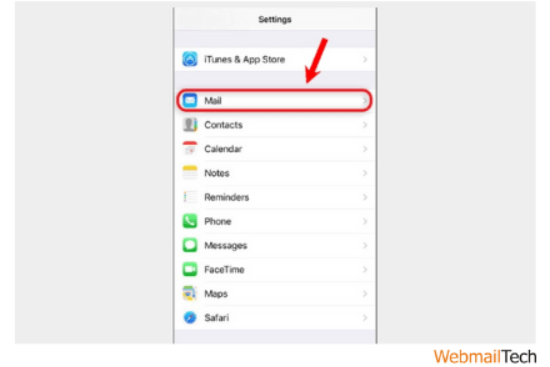
- Next, pick the account.
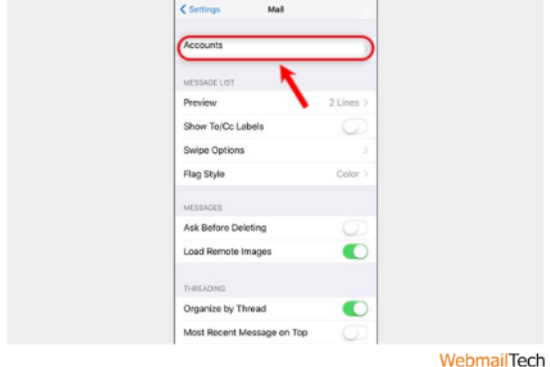
- Select add account.

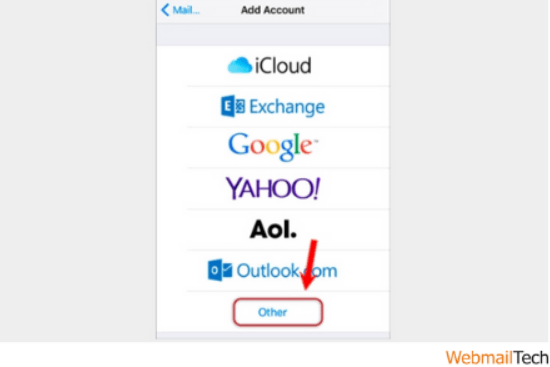
- You may now pick other option from the menu.
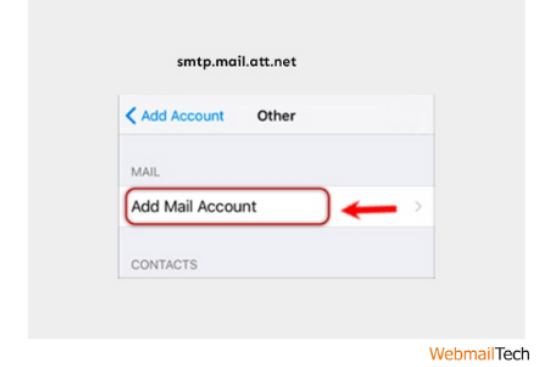
- After that, add a mail account.
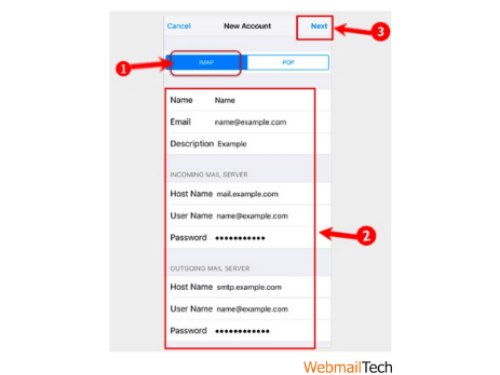
- After that, enter all of your useful details, such as your email address, and then click “Next.”
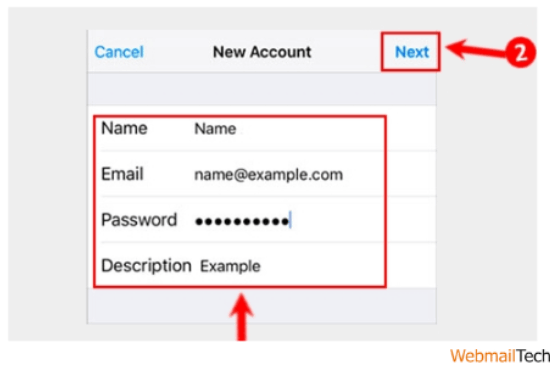
- Select IMAP, then scroll down to Incoming Mail Server and put up all of the useful details.
- The identical procedure is followed on the outgoing server, as seen in the screen below.
- Next, press the “Next” button.
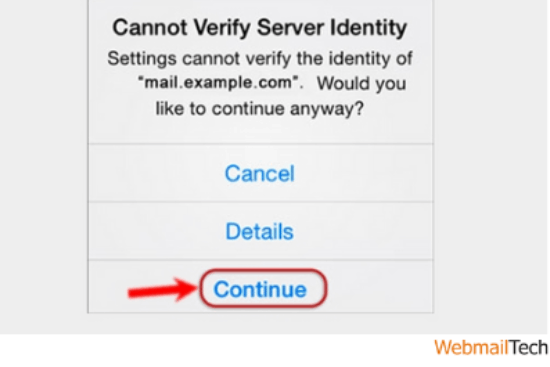
- If you receive a message asking for “cannot verify server identify,” click continue.
- Then, click Save.
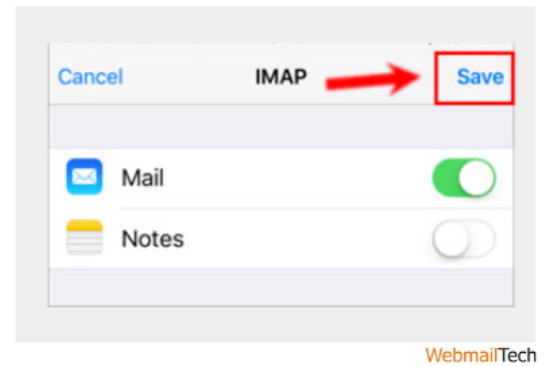
- Choose Your new account.

- Select SMTP server.

Also, make certain of the following:
- Your username is your full email address.
- Details were added.
- Imap.mail.att.net is the incoming server host name.
- Outgoing server Hostname = Smtp.mail.att.net
Once you’ve completed all of the above steps in order, you should be able to update the email settings on your iPhone.
If you follow the easy steps described below, you will be able to set up your account in a matter of minutes. All of your AT&T emails are now accessible on your Android and iPhone devices.
If you are still unable to set up your account, you may contact our technical team via live chat support for help and explanation. However, we do not believe you will require it because, after properly following the above-mentioned approach, you will be able to use the ATT email services on your device without issue.
Follow More Information, CLICK HERE