If you use EarthLink mail and want to know what the EarthLink Email settings are, you’ve come to the right place. This guide will walk you through all of the Earthlink email settings for various device types and Outlook versions. The settings are well-described, and there are no difficult steps to follow or execute. You may easily set up your Earthlink account on your device or Outlook using the options listed below. Because they have all been tried and tested, the settings will work perfectly. The settings mainly consist of two email server settings, EarthLink IMAP settings and EarthLink SMTP settings. Your account’s incoming emails are handled by IMAP server, while outgoing emails are handled by SMTP server.
EarthLink IMAP Configuration
The general EarthLink IMAP settings that you must employ in order to use the incoming email services with ease are given below:
- Enter your EarthLink email account.
- Click on settings in the upper left corner.
- Now choose your accounts.
- Select IMAP from the drop-down option.
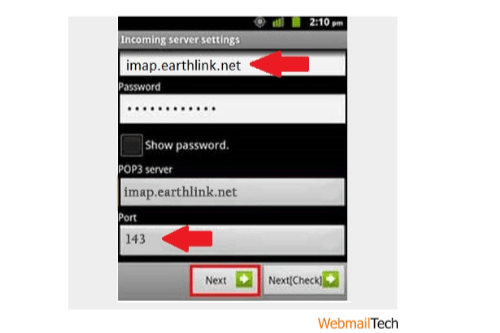
- Enter ‘imap.earthlink.net’ in the ‘Incoming Mail Server’ field.
- The value in the ‘Incoming Port Number’ field should be ‘143′.
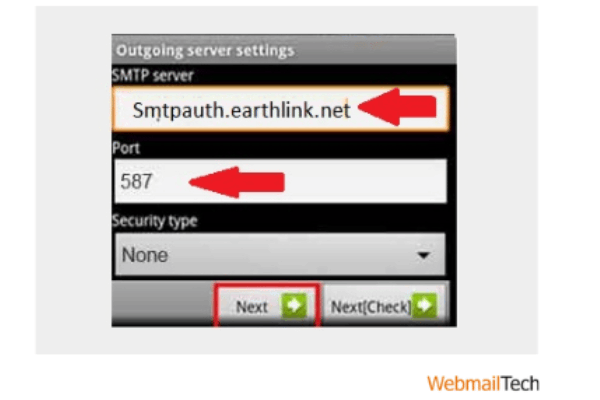
- As the ‘Outgoing Mail Server,’ type ‘smtpauth.earthlink.net’.
- The Outgoing Port Number should be 587.
- Acceptance should be clicked.
- You have now configured your IMAP account.
EarthLink Email SMTP Server Configuration
The required EarthLink email SMTP server settings for using the outgoing email services are listed below.
- Select the Mail icon.
- Click to Accounts Section.
- Enter your EarthLink email address.
- Fill in your entire email address in the username field.
- When prompted, enter your email password.
- The server’s hostname should be smtpauth.earthlink.net.
- 587 should be the port value.
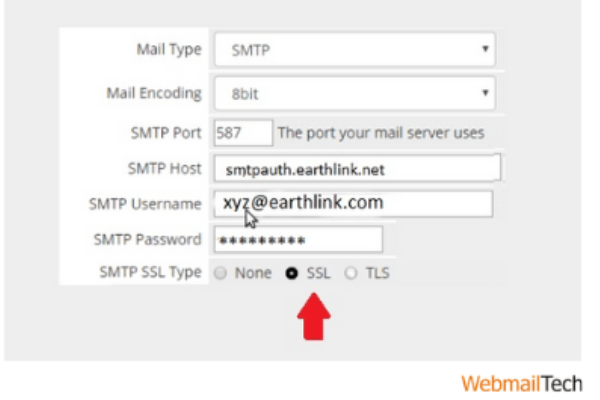
- An SSL/TLS certificate is required. Yes
- If the test parameters are enabled, run the test.
- If everything checks out, you’ve successfully enabled the SMTP auth Earthlink net settings.
EarthLink Email Configuration for iPhone and iPad
Are you having difficulty configuring the EarthLink email server settings on your iPhone or iPad? You may now rest since the steps and methods described below will resolve your Earthlink net server settings for the iPhone problem. All of the stages are simple, and you will have no difficulty following them.
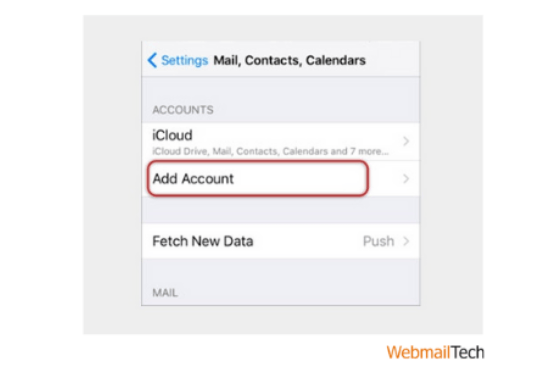
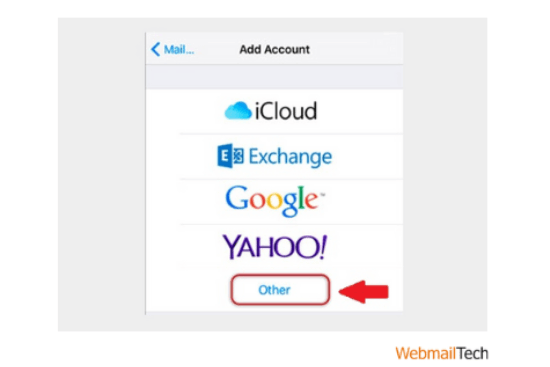
- From the Add account menu, select ‘Other.’
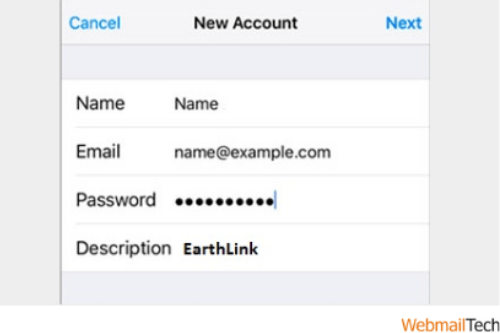
- Enter the following information in the Add Mail Account tab. Enter your full name, email address, email password, ‘EarthLink’ in the descriptions.
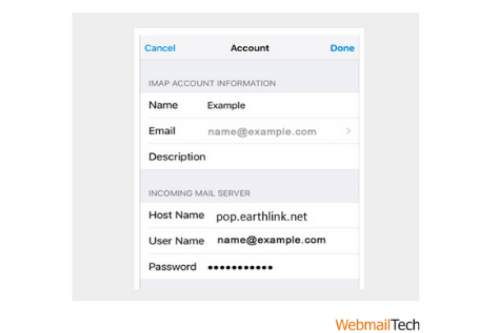
- In the ‘Incoming Mail Server Setting’ field, enter:
- The hostname should be pop.earthlink.net.
- Your email address should be your username.
- Your email password should be the default password.
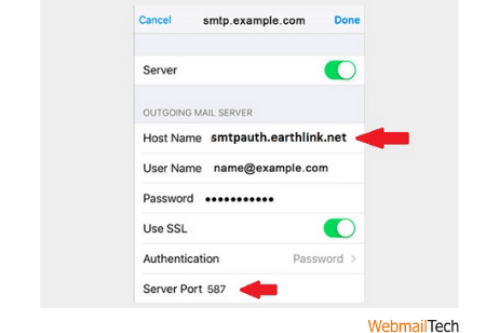
- Enter the following in the ‘Outgoing Mail Server Settings’ field:
- smtpauth.earthlink.net should be the hostname.
- The username should be the email address.
- The password should be the same as your email id.
- Save the changes and go to the next step.
- Enter the following under ‘Mail Server Settings’.
- SSL should be left alone. The server port value should be 587.
- Click the Save button.
- Restart your iPhone or iPad.
We are certain that the instructions describing the EarthLink webmail server settings for iPhone and iPad have assisted you in configuring your EarthLink account.
Earthlink Email Configuration For Mac
Let’s look at the EarthLink email settings for Mac now. The EarthLink email server settings are simple and will work with the majority of Mac web browsers.
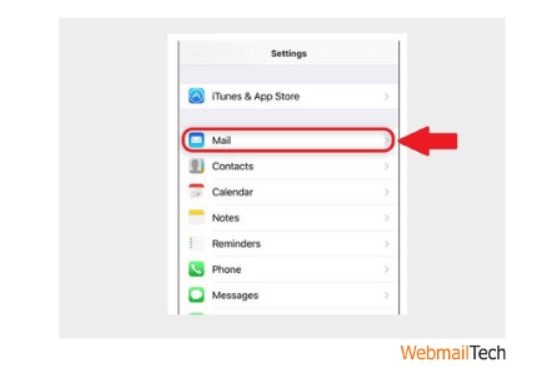
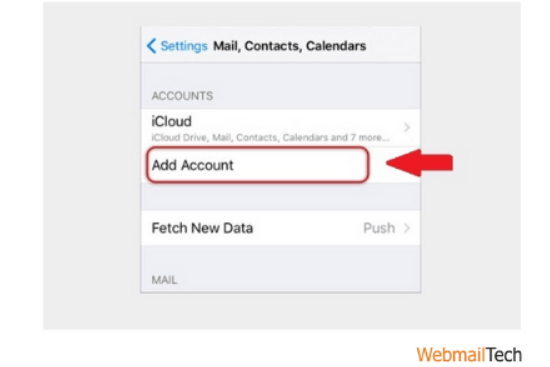
- Select “Add Account” from the “File” menu.
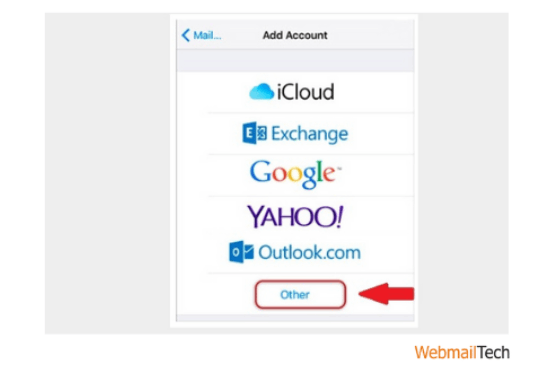
- Then select ‘Other’.
- Enter the following information in the Add Account section:
- In the place of the Full Name box, type your name.
- Enter Email Address section, type your whole email address.
- In the location of the password field, type the password.
- Select the “Continue” option.
- In the Incoming Mail Server box, provide the following information:
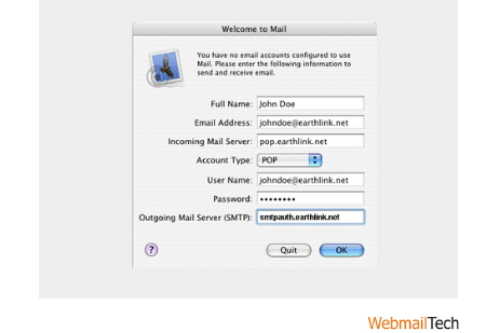
- For the account type, choose “POP.”
- In the incoming mail server field, type pop.earthlink.net.
- Enter Username area, enter your full EarthLink email address.
- In the password area, type the password.
- Select the “Continue” option.
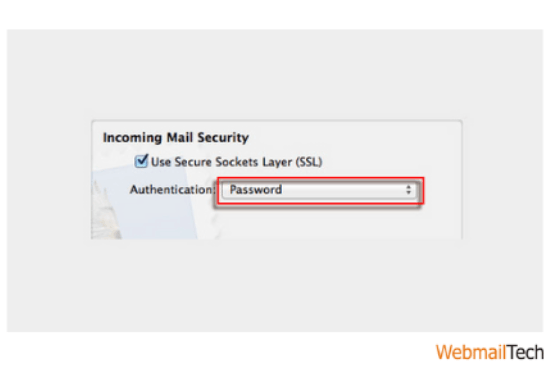
- Select the “password” option for Authentication and check the SSL box under the incoming mail security section.
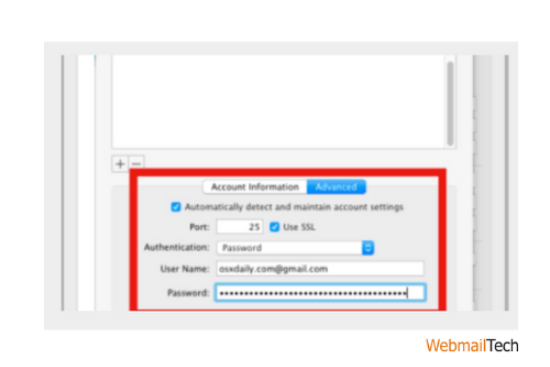
- To access the incoming mail server area, click the arrow on the drop-down menu and then select “Edit Server List.”
- For the outgoing mail server, use “Smtpauth.earthlink.net.”
- Select the “Use only this server” option.
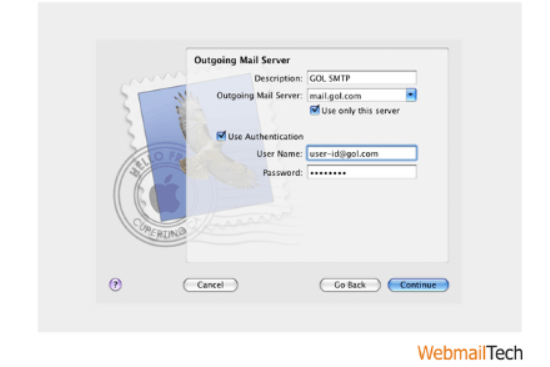
- Click the “Use authentication” option.
- Fill in the username and password fields.
- Select the “Continue” option.
- You will see a summary of the new account based on the options you applied; click the “Create” button.
- Finally, your account successfully formed. You will be able to send/receive emails without issue.
After you apply the aforementioned EarthLink webmail server settings for mac, you will be able to access all of the EarthLink email services on your mac without any problems.
EarthLink Email Configuration on Android
Do you want to know how to setup the EarthLink email server on an Android device? Simply follow the easy procedures given below in order, and your EarthLink account will be setup on your Android device in the blink of an eye.
- To start, open your email client.
- Select Settings.
- Click on the ‘Add new mail’ button.
- Enter your EarthLink account.
- Now, pick POP3.
- Please enter your email address and password.
- Manual is the best option. Set up.
- Enter information in Incoming Settings screen:-
- – Your Full Username.
- – Your Email ID’s Password.
- – Pop.earthlink.net should be typed in the Incoming server.
- – The port value must be 995.
- – The security type should be SSL.
- – Click Next.
- Enter the following for Outgoing settings:
- – Enter the Smtpauth Earthlink net settings in the ‘Outgoing Server’ field.
- – The value should be 587.
- – In the ‘Authorization necessary’ field, enter Yes.
- Next, click.
- Enter your preference here.
- Create a username for your account.
You have successfully configured your Earthlink email settings for Android account.
EarthLink Outlook Email Configuration
Learn about the right EarthLink email settings for Outlook here. The settings are more or less the same for all Outlook versions; so continue with the instructions below.
- Start Outlook.
- Select ‘File’.
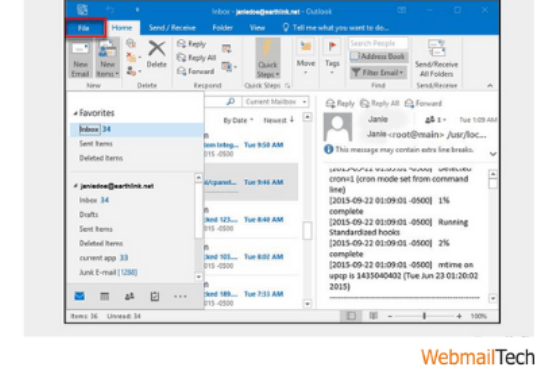
- Click to ‘Account Settings.’
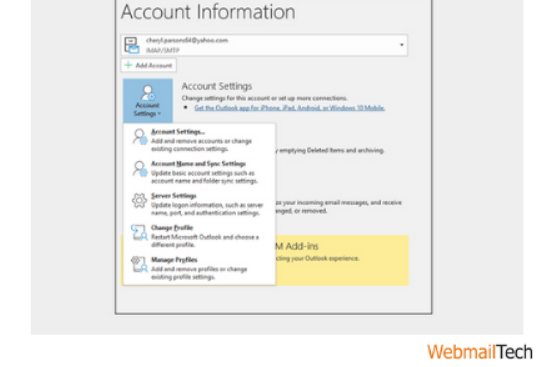
- Turn the settings to the ‘ON’ setting.
- Next, press the Next button.
- Choose ‘Internet email Address’ and input your EarthLink email address as well as your name.
- Click to ‘Account Type.’
- Select POP3 and then provide the following information.
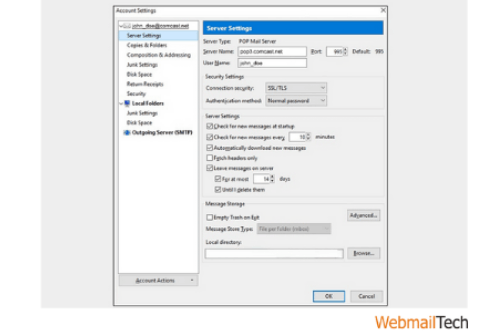
- – The incoming email address should be pop.earthlink.net.incoming.
- – The port value should be 995.
- Save the file.
- Enter your Login Details.
- Click on the ‘Test account settings’ button.
- If everything checks out, you’ve successfully configured your EarthLink email account in Outlook.
Congratulations, you’ve successfully configured your Earthlink Email in Outlook.
You may also get the best step-by-step settings for other email service providers, such as Frontier Email Settings and Juno Email Settings, right here. All of the processes are as simple as discussed in the article, and settings are supplied for all device kinds and Outlook versions. In addition, if you get stuck, you may always contact our technical staff.
Do you still need help setting up your EarthLink email account? Don’t worry, just connect with our technical team via live chat support and get immediate assistance. You can contact us 24/7 with any Earthlink email-related question or problem, and we will provide you with the best solution.
Final Envelop!
this EarthLink Email Settings on iPhone, iPad, Outlook, and Android blog surely help you to find the exact way to make your setting according to your device whether it is iPhone, iPad, or Android this blog can be a one-stop destination to resolve all your issues and help you to access EarthLink Email in an easy way. read this blog thoroughly and grab everything in a clear way.
Follow More Information, CLICK HERE
